Product costs, availability and item numbers may vary online or by market.
Plan the Installation for the Robotic Mower
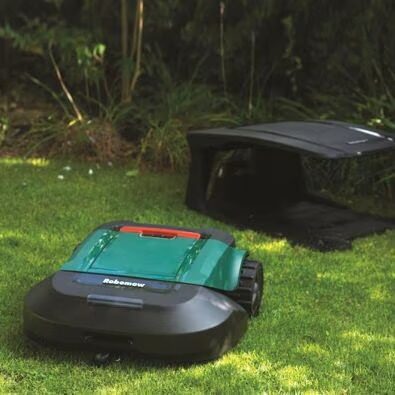
A Robomow robotic mower on a lawn in front of a charging station.
First, sketch your yard layout to plan the location of the charging station, installation of the boundary wire and guide wire if needed.
The charging station needs to be on a level part of the lawn at the perimeter of the mowing area. Check your manual for details on proper placement. Typically, there’ll need to be some open space around the station, and it should be out of direct sunlight. If you have lawn sprinklers, make sure the station is outside of the spray pattern. Finally, the charging station needs to be within reach of an outdoor power outlet.
The boundary wire outlines the mowing area. When the mower reaches the wire, it turns and heads in a different direction. The boundary wire needs to run from the charging station around the mowing area and back to the charging station. Note any areas you want to exclude from mowing – block them off with boundary wire – and any narrow sections the mower will need to navigate, such as areas between flower beds, so you can plan to lay guide wire if needed. If your mower uses a guide wire to return to the charging station, it needs to run across a large portion of the lawn – so the mower is likely to cross it – and connect to the boundary wire and the charging station. Plan the point where the wires will connect so you can place extra boundary wire at the location for easier connection.

Set Up the Mowing Area
These steps demonstrate in general terms how to set up a lawn for a robotic lawn mower. Always follow the setup and installation instructions for your specific mower.
Install the Charging Station, Boundary Wire and Guide Wire
Step 1: Prepare the Lawn for Installation
Before installation, inspect the lawn and remove any sticks, rocks and other obstructions. Mow the lawn; for aboveground boundary and guide wire installation, this will allow you to install the wire closer to the ground. Check for exposed roots or low spots that may interfere with installation or the operation of the mower and correct any problems you find.
Step 2: Set Up the Charging Station
A Robomow mower beside a charging station installed in the shade at the edge of a lawn.
Place the charging station and check it for level, adjusting as needed. Depending on your mower, the manual may instruct you to connect the charging station to power and begin charging the mower while you continue setting up the lawn. For other mowers, complete boundary wire installation before powering the charging station and charging the mower. Your manual may instruct you to secure the charging station to the ground at this step and connect one end of the boundary wire, or you may connect the wire later.
Product costs, availability and item numbers may vary online or by market.
Step 3: Begin Placing the Boundary Wire
Leave a couple feet of extra wire at the charging station and begin laying boundary wire along the perimeter of the mowing area, securing it to the ground with the included stakes or pegs. Check your manual for information on the direction of the wire, the spacing of the stakes, the distance the wire needs to be from the edges of the lawn and how to lay wire around corners. Use a rubber mallet or hammer to tap the stakes into the ground over the wire, making sure the wire is taut between the stakes and as close as possible to the ground. You may need to add extra stakes at low spots to keep the wire in close contact with the ground. As you lay the wire, make sure you’re maintaining the proper gap to the lawn edge. Many mowers come with a guide to help with proper spacing.
Your mower may have an option for installing the boundary wire a couple of inches belowground, which can be useful if you want to completely hide the wire or if the ground is particularly uneven. For this type of installation, you can use a flat spade to cut a slot in the ground around the mowing area and lay the wire in the slot.
Before beginning any excavation, call 811 to check for underground utilities.
If you install the boundary wire aboveground, the grass will grow around it and conceal it from view after a few weeks.
Step 4: Block Off Areas You Don’t Want to Mow
A Worx robotic mower mowing beside a planting bed.
In addition to defining the perimeter of the mowing area, you’ll also place boundary wire around areas within the lawn that you want to block off from the mower, such as planting beds or, depending on the mower, obstacles such as trees. You’ll run wire from the perimeter of the lawn to and around the water or plant feature and then back to the perimeter. The return wire must be parallel and touching – but not crossing – the wire running to the obstacle so the mower will ignore it and only recognize the boundary around the obstacle. See your manual for specifics. If you have a pond or water garden, you may need a barrier several inches high around the feature.

Step 5: Finish Laying the Boundary Wire
As you lay the boundary wire, you may want to create a few loops of extra wire in case you need to adjust the perimeter later. Remember to create a loop of a few inches of boundary wire to connect the guide wire, if your mower uses one. Once you’re back at the charging station, cut the boundary wire, leaving a couple of extra feet for connection to the station.
Step 6: Place the Guide Wire
Some mowers use a secondary wire to guide the mower back to the charging station when it’s time for a recharge or when the mowing program is complete. To install this wire, leave one end at the charging station with enough extra wire to connect it later. It may need to run under the middle of the charging station and extend straight out several feet. Run the wire across the lawn to the planned connection point on the boundary wire, securing it to the ground with stakes as you did the boundary wire. Make sure the guide wire extends across a large area of lawn where the mower is likely to cross it. Connect the guide wire to the boundary wire according to the instructions for your mower.
Step 7: Connect the Wires to the Charging Station
Different mowers use different methods to connect the boundary wire and guide wire to the charging station. Follow the instructions for your mower. Depending on your mower, you may need to plug in the charging station now.
Step 8: Test the Boundary Wire Placement
A Worx robotic mower running along the edge of the boundary wire next to a wall.
Some robotic mowers have an edge-mowing feature that allows them to cut along the boundary wire. If your mower has this function, test it now, following the mower along the boundary, adjusting the wire as needed to keep the mower from running into any obstacles.

Step 9: Check the Boundary Wire
Perform a final check on the boundary wire to make sure it’s taut, secure and fastened as low to the ground as possible. Make sure the stakes don’t protrude above the ground.
Step 10: Program the Mower
A close-up of the touch screen of a robotic mower showing icons for mower options and programming.
Follow the manufacturer instructions to program the mower. Functions may include:
⦁ Timer to define when the mower operates
⦁ Mowing height to control how closely the mower cuts
⦁ Weather/lawn growth settings
⦁ Theft-deterrent settings

Step 11: Test the Mower
A man using a smartphone to monitor a Husqvarna robotic mower as it mows the lawn.
Test the mower at the highest cutting setting. Make any adjustments needed to the boundary wires to keep the mower the correct distance from the edge of the lawn and from obstacles. Adjust the guide wires if needed.
If you have aboveground boundary or guide wires, you may need to set the mowing height to the maximum until the wires settle fully into the lawn.